Showing posts with label DIY Projects. Show all posts

December 23, 2016

Austin's Clothes

Austin's clothes remained in his drawers and closet for nearly two years. 
We didn't have the heart to deal with his room, so it remained vacant
with his things nearly as he'd left them.
It was too difficult for us to sort through, so we waited.

Items that would be useful to his brothers were pulled out,
but, the rest stayed put.  The occasional piece made its
 way back into the mix of wearing and laundry and life.

But, some of the more sentimental pieces remained untouched.
A little over a year ago, we moved Calvin into his room.

Austin's things were stored away to be sifted through at a later date.  
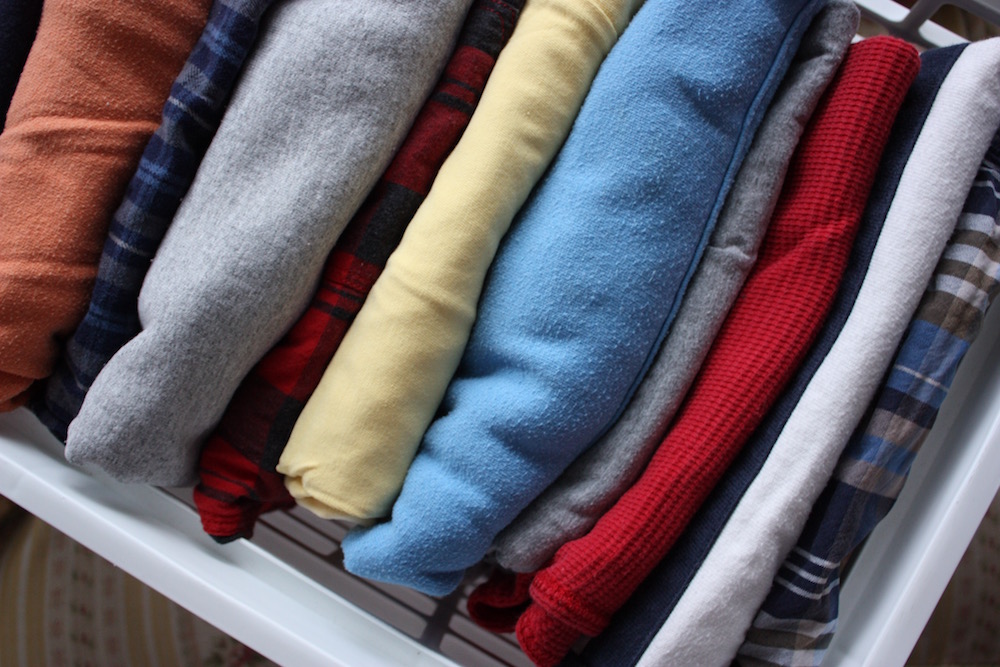
His clothes were packaged up into a bag and set on a shelf. 
His collections, books, keepsakes and violin occupied another shelf.
I don't know when we will sort through everything.  One step at a time.

Almost three years to the day after his home-going to heaven,
I pulled the bag of clothes off the shelf and opened it up.

I am not sure where the idea came from, but,
it seems to me that it was another grieving mother who shared
what she had done with her child's clothing.
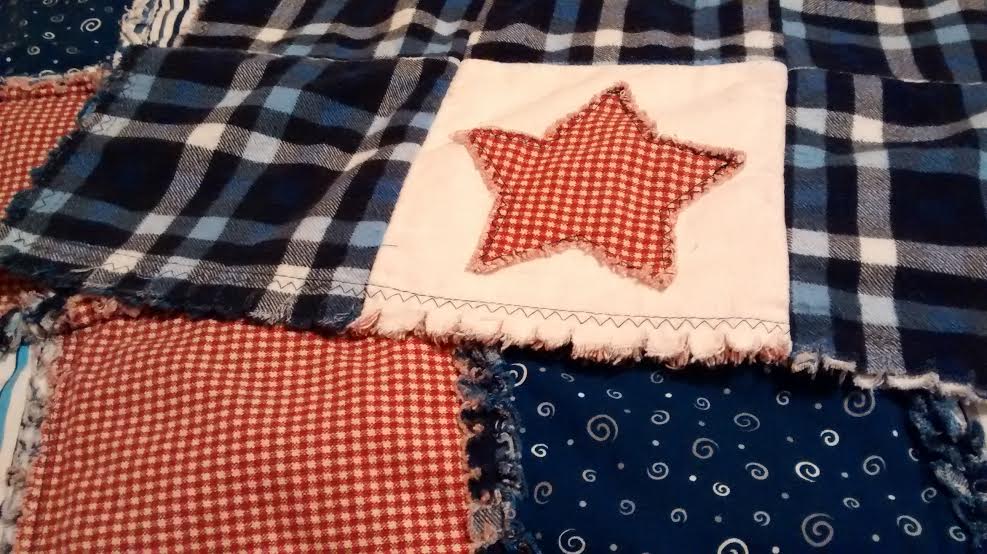
A raggy quilt had been made with the items.  What a wonderful idea!


So, that's what I am planning to do with some of Austin's clothes.  
I love it that it will be functional and in the mix of everyday life
  
Ready to be put to use or simply to view at any moment.  In any season.
After all, isn't that what keepsakes are for?
To be looked at and used and enjoyed?  Otherwise, they just gather dust.
I don't want Austin's things to languish on a shelf or sit tucked away in a box.

We are thankful to have these reminders of our Austin.
Each item of clothing that will be incorporated into this quilt is special.

It's a comfort to be reminded of our young man.
We speak of him often and smile as we remember.
Sometimes there are tears ~ at other times, there is laughter.
It's all part of the process of living here without him. 

I'm so thankful for that long-ago inspiration to make something
from the clothes he left behind.  It will be a treasure.

With Love,
Camille

October 18, 2016

Two Raggy Quilts

In recent days, I put together two raggy quilts
for two precious little people. It was so much fun!
  One side is made up with squares of flannel...


...and the other side is made up of cotton prints.


I used 7 inch squares of fabric for these two quilts.
And, they are both 8 squares by 8 squares in size.


I feel like a kid in a candy shop when I am choosing fabric.
Piecing that fabric together, however, can be a bit more of a challenge.
My sister helped with that process via texting.
Technology can be an amazing tool, can't it?  Thanks again, Janine.  XO


For step-by-step instructions on how to put
a raggy quilt together, click here.  So easy and so forgiving.

The main difference between these quilts and my first one is this ~
the edges of the jean quilt haven't been snipped.  But, I am planning to change that soon.
The quilts in this post have been washed up and are all ready to be given away.

What projects do you have on the go?  Tell me everything!  :)
Have you ever made a raggy quilt?  If not, why not?  Ready...Set...Go!

Happy sewing/crafting!
With Love, Camille

October 29, 2015

What it Is

Our home was a stepping stone to something better.
Or so we thought.  We didn't realise what a gift it was.
 We had absolutely no intention of staying long term.
In fact, we never planned to move in at all.

Thankfully, our plans very often are not God's.

In light of all these things, we didn't document our home in its before state.
We lived life and sought to make memories of family times.
When we ventured into our renovation, we took a few before photos
for posterity's sake.  Even those seemed to be an afterthought.  

Some things still need to be attended to.  Other things need tweaking.
Doors and mouldings that require a coat of paint still wait for it to be done.
The odd window remains un-curtained.  It is how it is.
We'll get to it eventually.  The bulk of the work is done.

We are thankful to be on this side of it all.

For evidence of the tweaking and adjusting we continue to do
please click here and here and here and here and here!
Now, on to the before and after shots of the only home our
children have ever known.  We realise what a gift it is now.

This was our kitchen for nearly nine years.


This is the same view today.


Creamy white appliances (note the fridge) were what we originally installed.
One by one they have needed replacing.  (They don't make things like they used to.)
It took me nearly six months to decide to switch to stainless
when I was told that creamy white was no longer available.

The fridge (at 11 years old) is the hold out.
Perhaps it will last another ten.  I hope so.  :)


The pony wall (above).  And, now (below).


Looking from inside the kitchen toward the back sundeck.


Same view....now.


Our living room then....


...and now.


Upstairs Bath then....


...and now.


Looking down from the front entry through 
to the back of the house. 


The basement bath is on
the other side of the photo wall.
This is how it looks today.


The tenant's living room/office/playroom/schoolroom/office/schoolroom.
(Listed in order of the many functions it served over the years.)


How it was in 2009.


How it looks today.


The view from outside the laundry-room door looking in.


Then (during the demolition of the deck above)...
and now.  From the outside of the house looking in.


Howie and my Dad rebuilding the laundry room/office.
Here it is gutted....


...as the schoolroom in 2012...


...and, as Howie's office today. 


Basement bath in the process of being dismantled...


...and being rebuilt.


This is how it looks now.


Our front deck area then...


...and now.


What it was in 1994....


...and what it is today.


When I first embarked on this series, 
I had no idea that it would end up being so long.
Thank you for joining with me as I travelled down memory lane!
It's been fun to have you along for the ride.  

Happy Thursday Y'all.  :)
With Love, Camille

**Previous posts in this series may be found by
clicking here (introduction),
here (part one), here (part two), here (part three),
here (part four), and here (part five).

October 26, 2015

What it Became ~ Part Five

In order to tell a more complete version of this story,
I'm going to back up just a little bit to the early days of home ownership.

One of the first things that had to be attended to was the rotting back deck.
My Dad was indispensable and a wealth of knowledge when it came to
tearing down and rebuilding.  Over the years, it has been rebuilt twice.
Both times, my Dad was involved in the process.


Underneath the deck was the shared laundry room/shed.
It was accessed by the tenants through what is now Howie's office door.
I would dash down the stairs out the back of the house and enter
through an exterior door that is no longer there.

In those days, laundry was a near daily occurrence.
It's no wonder that our septic field eventually faltered.


When we opened up the house and took over, the laundry room
(shown above) became Howie's office space.
The lower part of the room was rotted out, so, my Dad
and Howie rebuilt it.  Fun times.  See the smile?  :)


This is the view into the room from what was once the exterior door.
The door wall was closed in and another window was added in its place.


Just outside Howie's office, there is a basement bathroom.
It was super tiny and had many issues.  It needed attention.
See the plumbing pipes to the left of the ladder?
That was where the bathroom wall had been.
The sink originally was jammed between the toilet and that wall.

We had those pipes re-routed further along to allow for
a regular sized vanity to be installed.
This entire room was completely destroyed and rebuilt.


Along the way, mistakes were made.
The wall shown below was to be an extension to the basement hallway.
It led to Howie's office, the bathroom, and Austin's room.
Once this wall was framed and wired, we realised that it had a few problems.

The hallway narrowed too much and
Howie's office would be accessed via the bathroom!  Oops.

My Dad puzzled this one through and rebuilt the wall.
He made an angle in it and the hallway was extended to the right.
Howie's office and the bathroom would each have their own
separate doors.  Brilliant!


This is how it looks now ~ see the cute little angle?


And here is the view down the little hallway
(to the right in the photo above)
which leads to the bathroom and Howie's office.


Once the basement bathroom was completed,
we were able to dismantle the upstairs bathroom.
Howie was becoming an expert at demolition.  :)


The mirror wall was covered with a layer or two of wallpaper
which had been painted once or twice.  I'm sure it made sense to someone.
We came to the conclusion that the drywall had to be removed and replaced.


A new counter top was built on top of the original cabinet (thanks, Dad!).
We removed the doors in order to fix and paint them.
This is an example of one of the ways in which we were able to
 keep the total cost of our renovation to a minimum.


I had my heart set on a nicer sink than Howie had planned on.
The difference in cost had to be made up somewhere else.  My solution?
I bought a discounted remnant of linoleum and redid the floor myself.

That was an experience!  (Pre-YouTube days.)   :)
However, it was worth it.  That sink is still one of my
favourite features of that bathroom.


One of the last things we did was replace the blue carpeting.
The night before it was due to be installed, we removed the old.
Unfortunately, we found that the underlay had been glued to the plywood
in both the living room and Emma's bedroom.


A job that should have only taken a couple of hours ended up
taking us all night.  The children slept through it all.


See what I mean about my Dad?  There he is again!
He was such a huge help to us throughout the process of transforming our home.
The night before the carpeting was installed, he dropped everything and
came to create and fasten nosings to our flight of stairs.

Just a little side note ~ the hallway wall colour in the photo below
is the same colour as the hallway leading to Howie's office (shown above).
As the lighting varies, the shade appears to be different.  It's an illusion.


It was nearing Christmas when the carpeting was installed.
This photo was taken prior to moving everything back into the living room.
We set the children up to watch "Rudolph the Red-Nosed Reindeer" and
I snapped a photo.  I had no idea how much I would love it.  But, I do.

It brings back such happy memories
of those precious days of long ago.


And then, before we barely caught our breath,
our little princess turned three!

Our major renovation was complete.  Just a memory.
Nearly eleven years later, we feel like we are still recovering.
Because we got caught up in life, some of the finishing was left undone.
 One by one, we are crossing those items off our list.

I suppose, if it ever comes time to sell,
we will be forced to get them all done.  Perhaps that is what it will take.
In the meantime, we will live life and seek to take things as they come.
By God's great grace and in His strength.

Eternity is what really matters.  May we be found living life
in light of this truth while the Lord has us here.


This series is coming to a close.
Next up....before and after shots.
And, that will be that!  :)

With Love, Camille

**Previous posts in this series may be found by
clicking here (introduction),
here (part one), here (part two), here (part three),
here (part four), and here (conclusion).