Showing posts with label Recipes ~ Breads/Cereals. Show all posts

May 11, 2016

Soaked Muesli

Calvin is one of my biggest fans when it comes to food.
He's always been that way.  In fact, there's a cute story to tell
from his toddler years that I'm quite sure will be shared at his wedding.
Suffice it to say, he likes most of what gets whipped up in my kitchen.

And, this is no exception.

Muesli is uncooked oatmeal.  Stir everything together at night,
and enjoy in the morning.  Straight from the fridge.
Add in a banana, toss on some chopped nuts, and drizzle
maple syrup over it all.  You can't go wrong.  It's perfect.

At least, Calvin and I think so.  :)


What you will need:

2 cups Old Fashioned Rolled Oats
3 cups Milk (I used Unsweetened Vanilla Almond Milk)
2 cups Greek Yogurt
1/2 cup Liquid Honey (organic, if possible)
1 and 1/2 cups Craisins (dried cranberries)
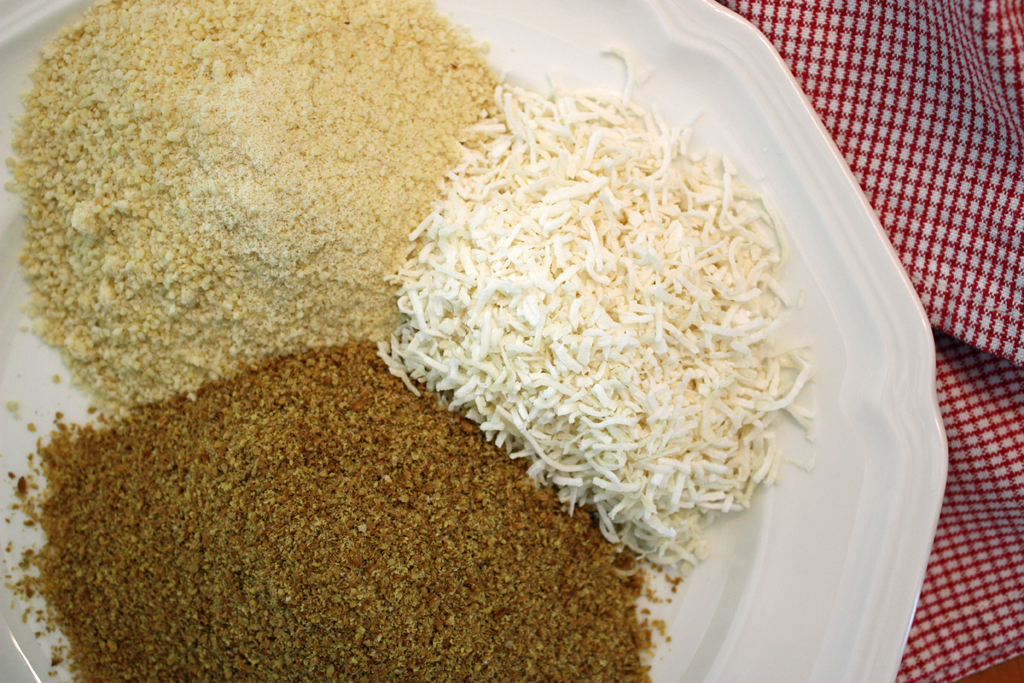
1 cup Shredded Unsweetened Coconut
1 cup Almond Meal (ground almond flour)
1 cup Flax Meal (ground flax seed)
3/4 tsp Sea Salt
2 tsp Ground Cinnamon
3 Organic Apples ~ diced

Banana slices, chopped nuts and Maple Syrup for toppings.
(Chocolate chips?  More dried fruit?  Anything goes!)


What you do:

Mix the dry ingredients together in a large mixing bowl.
Add all the wet ingredients into the same mixing bowl.
At this point, it will be quite sloppy, but, it with thicken up...promise.

Stir together well and put into a glass bowl or storage container.
Cover and set in the fridge overnight.  This is when the magic happens.

In the morning, scoop out the amount desired to fill hungry tummies
into individual cereal bowls, add toppings, and enjoy!
We like sliced bananas, chopped pecans, and a drizzle of maple syrup on ours.


Muesli is flexible, so, feel free to adjust the ingredients
to suit your own taste.  If you want a thicker consistency,
add more oats to your recipe, or, reduce the amount of liquids.
You can substitute water for the milk.  Or use cream to thin it in the morning.

One thing to note, however, is that the yogurt should be kept in
the mix in order for the oats to be properly soaked.
They are more easily digested that way.

This recipe will serve approximately 8 hungry people,
and will keep for up to three days in the fridge.
Happy (stress-free) mornings to you!  :)

With Love,
Camille

**To make this gluten free,
be sure your oats are certified GF.

August 12, 2015

Coconut Pecan Zucchini Loaf

On my sister's last morning here, we sent them
on their way with a big breakfast in their tummies.
Scrambled eggs, bacon, hash browned potatoes, baked oatmeal
and fresh fruit were all on the menu.

I went out on a limb and took my chances with a new recipe.
Since there was so much food, it wouldn't have mattered
if it had been a flop.  But, it wasn't.  I wish I'd made two.

It ended up being the star of the show.


Coconut Pecan Zucchini Loaf ~ originally found in
"Biscuits, Muffins and Loaves" by Jean Pare  ~ altered slightly.

What you need:

1 large Egg

1/2 cup Cooking Oil (I used grapeseed)

1 cup Sugar (I used evaporated cane juice)

1 cup Zucchini (washed and grated ~ skin, too)

1/2 tsp Vanilla Extract

1 and 1/2 cups all purpose unbleached Flour**

**(I used half whole wheat and half all purpose in the loaf pictured here ~
but, I must admit, the loaves with only white flour were prettier and lighter.
You'll have to decide which route you want to go with this one.
I wash my hands of it.  Next time, however, I plan to make them with all white.)

1/2 tsp Baking Powder

1 tsp Baking Soda

1/2 tsp Sea Salt

1 tsp ground Cinnamon

1/2 tsp ground Nutmeg

1/2 cup medium, shredded, unsweetened Coconut

1/2 cup chopped Pecans (I used soaked and dried)

1/2 cup Craisins (dried cranberries)


What you do:

Beat the egg, cooking oil, and sugar together in large mixing bowl.
Stir in the zucchini and vanilla.  Set aside.

In a medium bowl, mix together all the dry ingredients, including the nuts
and craisins.  Stir thoroughly.

Combine the wet and dry ingredients together in the large mixing bowl.
Stir until just moistened and all the dry ingredients are incorporated.

Line a 9 x 5 x 3 inch loaf pan with parchment paper.
(Or, grease the pan if you don't use parchment.  I love using parchment!)

Preheat oven to 350 degrees F.
Bake at 350 F for 1 hour until wooden toothpick tester comes out clean.
Cool for 10 minutes in the pan.  Remove to rack to cool completely.

This loaf cuts better the next day.
For our breakfast, I baked one of these (not the one pictured)
the night before.  It sliced up beautifully.  And, tasted even better.

Happy Breakfasting!  Or, tea-time-ing!  :)

With Love,
Camille

April 16, 2015

Perfect Popovers ~ Every Time

Are you familiar with popovers or 
Yorkshire pudding (as they are known in England)?
These little beauties are a *must have* 
when you serve roast beef dinner with gravy.

Oh. Dear. Me.  They are wonderful!

But, they have a reputation of being difficult to make.
After all, they are not to be flat, but, light and hollow.
It can be a little tricky to achieve the elusive perfect popover.
I speak from experience.  Flat, dense popovers are in my culinary history.
Has that ever happened to you??

Well, no more.


I am here to tell you that it really isn't difficult.  Really.
Popovers are easy when you know the tricks of the trade.
Wanna know the secrets?
Here's my recipe for perfect popovers ~ every time!

Original recipe may be found here.  This cookbook is where my recipe comes from.
Tricks of the trade from my sweet Mum-in-Love years ago.


What you need:

Neutral tasting oil for pans (I like grapeseed)
4 large eggs, beaten
2 cups milk
2 Tbsp cooking oil (grapeseed or olive)
2 cups all purpose unbleached white flour
1/2 tsp sea salt


What you do:

Drizzle 1 to 2 tsp oil into the bottom of each muffin cup in a metal muffin pan.
Place your pan into preheated 400 degree F oven for about ten minutes.
Meanwhile, in a large glass mixing bowl, whisk together the eggs, oil, and milk.
Whisk in the flour and sea salt until smooth.  Small lumps are fine.

Remove your preheated pan from the oven and immediately pour in the batter.
It should sizzle...that's how you know your pan is hot enough.
Divide batter evenly between 12 muffin cups.
Return to 400 degree oven and set timer for 40 minutes.

The popovers will puff up beautifully and turn a golden brown.
As soon as you remove them from the oven, poke with a fork to let steam escape
and twist in the pan to allow air to circulate underneath (as shown above).


Here are the rules for perfect popovers every single time.

Rule number one ~ Your oven must be HOT before you put these lovelies in to bake.

Rule number two ~ Your pan must be well-oiled (about 2 tsp per muffin cup) 
and preheated in that HOT oven before the batter goes into them. 
Preheat for at least 10 minutes until the oil is smoking.

Rule number three ~ While the preheating is going on, mix up your batter.

A wire whisk will do...just mix by hand until smooth.

Rule number four ~ Pour the batter into the muffin tins quickly.

The batter should sizzle since the pan is so hot.

Rule number five ~ Return pan to oven immediately and bake.
And, that's it!  Easy peasy.  


So, next time you make a roast beef dinner, whip up a batch
of popovers to serve along with the meat and potatoes.  Be sure to have gravy.
Your family (and guests) will appreciate your efforts.  I am sure of it.

Any questions?  Do you have any other tricks to add to this list?
Please let me know if you give them a try.
It would be lovely to hear how they turn out for you.

Many Blessings,
Camille

March 27, 2015

Brown Sugar Granola

Mornings go better with granola, right?
At least, that seems to be the consensus around these parts.
Apparently, it doesn't get made often enough in this here kitchen.
The other day, a request was put in by one of our boys for some, so, I obliged.

I agreed that some granola might be a nice change from
the usual oatmeal.  I was right.

Everyone approved.  And, the granola?  It was easy and yummy.
Next time, maybe it will be a boy who whips up a batch.
This one didn't last more than two days.


Jennifer Jo has posted more than one granola recipe over
the last few years on her blog.  I dug this one out of her archives.
Only a few alterations were made from the original recipe found here.
Thank you, Jennifer Jo...your recipes are always a win with all of us.


What you need:

10 cups old fashioned rolled oats
1 cup chopped pecans (soaked and dried are best)
1 cup unsweetened, shredded coconut
1 and 1/3 cup golden brown sugar
a light sprinkling of sea salt
2/3 cup melted coconut oil (unrefined, cold pressed)
2/3 cup grapeseed oil (or any neutral tasting oil)
3/4 cup water
1/2 Tbsp maple flavouring
2 tsp pure vanilla extract


What you do:

Mix together dry ingredients in a large mixing bowl.
Mix together all wet ingredients in a smaller bowl.
Pour wet ingredients over dry and mix thoroughly.
Spread onto two jelly roll pans (cookie sheets with sides) lined with parchment paper.

Bake at 250 degrees F for 2 to 3 hours, stirring every 30 minutes.
Test for doneness by removing a small amount of granola and allowing
to cool...it should be golden in colour have a nice light crunch to it.

Serve with cold milk and any add-ins you like.
Store in a sealed container and use in about a week or so.
Freeze for longer storage ~ absolutely not necessary around here.

Happy Granola-ing!
Many Blessings, Camille

March 16, 2015

Scary Good

For Christmas morning breakfast, it's our tradition to have cinnamon buns.
They are time consuming and require a little advance planning to make it to the table.
I usually bake them ahead of time and pop them in the freezer so they are all ready to go.
This year I wasn't motivated, so, I purchased ready made cinnamon buns.

But, then!  This recipe flashed across my screen and suddenly,
I knew what had to be done.  And, that's what I did.

I found that following the recipe exactly resulted in too much bread.
(My instructions are similar to the ones on the side of the bag of frozen buns).
So, the number of buns required has been reduced, which is how we all prefer it.
And, did I mention that they almost pass for the real deal?
They're scary.  Scary good.  :)


Follow these simple instructions in order to have some amazing cinnamon buns
fresh from the oven in the morning.  Your loved ones will love you (more) for it.


Go to the freezer section of your grocery store and pick up a bag of
unbaked frozen white dinner rolls.
Generously grease a bundt cake pan with butter,
and lay 12 rolls in the bottom of it ~ they may overlap a little.


Sprinkle with 2 Tbsp Bird's Custard Powder, 1/2 cup brown sugar,
and 1 Tbsp ground cinnamon.  Pour 1/2 cup melted butter over all.

If you cannot get your hands on Bird's...then, any cooked
vanilla pudding powder will do.  You use it in the powdered state.


Cover with plastic wrap and set on counter for about 8 hours (overnight).


In the morning, preheat oven to 350 degrees F and remove
plastic from buns.  Bake for 20 to 25 minutes until golden brown.


Turn out (top side down) onto serving plate and
allow to cool a little before glazing.


Whisk together icing sugar, cream and vanilla extract
until a barely pour-able glaze is made.


Drizzle over cinnamon buns and serve immediately.
They are best warm and eaten all up on the first day.
(That's never been a problem around here).


Enjoy!  (Just not too often...wink.)
I need to follow my own advice on this one.

With Love, Camille

February 25, 2015

Gluten Free/Dairy Free Banana Muffins

So, here's the thing ~ gluten free and dairy free baked goods can be yummy.
These muffins prove it.  Howie couldn't believe they were GF.
When he kept commenting on how much he was enjoying them, I told him my secret.
GF/Dairy Free Banana Muffins ~ If you don't tell, no one will guess.


What you need:

1 cup mashed Bananas
2 large Eggs
1/2 cup Coconut Oil, melted
1/2 cup granulated Sugar (I use evaporated cane juice)
1/2 cup finely ground Almond Flour
3/4 cup Gluten Free flour mix
(I use Namaste Perfect Flour Blend which has xanthan gum included ~
it's my favourite brand of GF flour of all time.)
3/4 tsp Baking Soda
1/2 tsp Baking Powder


What you do:

Mix together the bananas, eggs, sugar and melted coconut oil in a mixing bowl.
In a separate bowl, mix together the remaining ingredients from the almond flour
through to the baking powder.  Whisk together thoroughly.
Mix the wet ingredients together with the dry ingredients and stir until completely blended.
You could add in chocolate chips and/or chopped nuts if desired.
It's not necessary to add anything to these...they stand up well on their own.


Spoon into paper lined muffin tins.
Batter should come to the top edge of each of the paper liners.
Bake in preheated 350 degree F oven for 20 to 25 minutes.
Toothpick inserted into the centre of several muffins should come out clean.
Cool five minutes in pan and then remove to cooling racks.

Be sure to serve these while they're still warm.
However, even after they were completely cold,
Howie expressed his hearty approval and asked for another.


This recipe makes 9 or 10 regular sized muffins.


So, there you have it.  A gluten free, and dairy free muffin that
tastes just as yummy (or, more yummy according to some)
as its wheat laden counterpart.

Who says Gluten Free can't be good?

Happy Baking!
With Love, Camille

January 6, 2015

Best Baked Oatmeal!

I know I've shared baked oatmeal recipes before.  I still like them.
But, this one is my new favourite.  The recipe was found on Jenny's blog.
And, I've made it over and over again.  It's one the kids request
and get excited about.  I've even been known to serve it to company.  Yup, it's true.  

If you bake up a batch, I'm sure you'll understand why.


I like it made with blueberries or raspberries or a combination of both.
It's wonderful all three ways.  See?  Told you it's been made many times.
It was what was for breakfast this morning....with raspberries.

Here's what you need.

1 cup Sour Cream
1 1/4 cup Milk (I use Almond Milk)
2 Eggs, beaten
2 Tbsp Butter, melted
2 tsp Vanilla Extract
3 cups Rolled Oats
1/2 cup Brown Sugar
2 tsp Baking Powder
3/4 tsp Sea Salt
2 cups Frozen Blueberries or Raspberries

Here's what you do.

Mix together sour cream, milk, eggs, butter and vanilla in large bowl.
Stir in the oats until well blended.
Mix together the brown sugar, baking powder and sea salt in small bowl.
Stir the dry ingredients into the oat mixture and mix together well.
Fold in the frozen berries.  Pour into greased 10 x 15 inch glass baking dish.
(You could bake this in a 9 x 13 baking dish for a more cake-like product).

Bake in a preheated 350 degree F oven for 25 to 30 minutes 
until set in the centre and browning on the edges.

**If you want to have soaked oatmeal, just make this up the night before
and pop it into the fridge (covered with plastic wrap) and bake the next day.
Place cold (uncovered) dish into the cold oven and leave it there
for the preheating stage and then set the timer for 25 minutes once
the oven has reached its proper temperature.**


Depending on how hungry your people are, this will serve 6 to 8.
Serve hot in a bowl with cream or milk.  Enjoy.

Happy Tuesday Y'all!
With Love, Camille

November 17, 2014

Six Week Bran Muffins

This is an oldie but a goodie ~ it's definitely not new.
But, it merits another go-around.
Breakfast all ready to go in the morning is always a great idea.
So, whip up a batch and enjoy!

This batter will keep for up to six weeks in the fridge ~
however, around here it's gone in about two days!
Original recipe found in Company's Coming Biscuits, Muffins and Loaves
several adjustments made by moi.


4 cups Bran Flakes cereal
2 cups All Bran cereal
2 cups boiling water
1 cup butter, room temperature
1/2 cup granulated sugar (already reduced)
1 cup brown sugar (already reduced)
4 large eggs
4 cups buttermilk
1/4 cup fancy molasses
3 cups whole wheat flour
2 cups all purpose flour
2 Tbsp baking soda
1 Tbsp baking powder
1 tsp sea salt
2 cups craisins or raisins
2 tsp ground cinnamon
1/2 each ground cloves, allspice, and nutmeg

**I substituted whole wheat flour for some of the white...

if you want a lighter muffin, you can use all white flour.


In large mixing bowl, place the two cereals and pour boiling water over.
Mix and let stand to partially dissolve.
In mixer, place softened butter and the two sugars.
Cream together until well mixed.
Add in eggs one at a time and mix after each addition.
Stir in the buttermilk.  Mix together with the cereals in large bowl.

All your wet ingredients should now be together in the large mixing bowl.

In a separate bowl, stir together all the remaining ingredients with a whisk.
Add the dry ingredients to the wet and stir until just incorporated.
Transfer to a storage container (glass or plastic...not metal) and seal.
May be kept in the fridge for up to six weeks.
However, I have never had mine as long as that.  
I would aim for no longer than one month,
but, that is just me.  :)

To bake, preheat oven to 400 degrees F.

Line your muffin tins with parchment or paper muffin liners.
Fill lined muffin tins 3/4 full ~ I fill mine to just below tops of paper liners.
Bake for 20 to 25 minutes until toothpick inserted in muffins comes out clean.
Let cool 5 minutes in pan prior to removing to wire cooling racks.

**Important ~ If you should bake these right after mixing the batter up,

don't bake as long!  Begin checking them after about 17 minutes.
The chilled batter takes longer to bake than when it's at room temperature.
It should be obvious, but, apparently not.  I over-baked my first batch.

Happy Baking and...Happy Monday!  :)
Many Blessings, Camille

October 7, 2014

Sour Cream Streusel Muffins

I've served these up for brunch.  
Yessirree...I have!  They do not qualify as *healthy*.  
But, dear me...are they ever good!
I'll bet you'll love them as much as we do.  
You won't regret it if you bake up a batch.  Promise.


Original recipe was found in "Mad About Muffins" by Dot Vartan ~

Altered slightly by moi.  :)

~ Ingredients ~

2 cups all-purpose, unbleached flour
1/2 cup granulated sugar (I use evaporated cane juice)
1 Tbsp baking powder
1 large egg
1/2 cup melted butter
1 cup full fat sour cream
1 tsp pure vanilla extract

~ Streusel Topping Ingredients ~

1/3 cup granulated sugar (evaporated cane juice)
1/4 tsp ground cinnamon
3 Tbsp butter, cold
1/2 cup chopped pecans


~ Method ~

Heat oven to 400 degrees F.

Measure first three ingredients into large bowl and mix together with a whisk.
In another bowl, beat the egg and whisk into it the sour cream, melted butter and vanilla.
Add the sour cream mixture to the flour mixture and stir by hand until just moistened.
Fill twelve parchment (or paper) lined muffin cups with batter.


Make the streusel topping by mixing the sugar and cinnamon together in
a medium bowl.  Cut the butter into these two ingredients.
Stir in the chopped pecans.  Spoon  about one tablespoon of this topping
onto each of the muffins prior to baking.  Press down a little.
Divide the topping evenly between the twelve muffins and bake.


Bake at 400 degrees F for approximately 18 to 20 minutes.

Done when a toothpick inserted into the centre of a muffin comes out clean.
Remove to a wire rack to cool.  Don't cool too much ~ these are best when warm.
It's a good idea to have a few loved ones nearby to share with.
Don't say I didn't warn you.  ;-)

Happy Baking!

With Love, Camille

May 12, 2014

Soaked Oatmeal Pancakes

I'm not sure what happened.  I guess I just dropped the ball.
These pancakes are a favourite around these here parts.
But, I've neglected to share them on the blog.  So sorry!

Well, today, that is going to change.  :)

Soaking grains is a good idea.  It makes them more digestible.
A good thing, right?  Soaking also frees up valuable morning time.
Since some of the prep is done the night before, 
a good breakfast is more quickly put together when time is short.

Another good thing, if you ask me.


I served these many moons ago to a sweet friend and her hubby
when they stayed with us for an overnight visit.
They were a hit.  She's since made them for her own family.
Over and over again.  Recently, she reminded me of their yumminess,
and I dug out the recipe and began making them regularly once again.


In the photo, above, you see the oats and flour after an overnight soaking.
Ready and waiting for the add-ins of the morning.


First, all the wet ingredients are mixed in, and then the dry.
It goes much better if the dry ingredients are mixed together in a bowl
before adding to the batter.  There's nothing worse than a clump of
baking powder or salt to wake up the taste buds!  This will alleviate that.


Once thoroughly mixed, the batter needs to rest for a few minutes to 
allow for a little baking soda action.  The mixture will rise a little.


Have I mentioned that I *love* coconut oil?

Well...I do!  It's a perfect substitute for butter in baking.
It has a high smoking point which makes it wonderful for frying.
And, it's good for you.  Yippee!  Yahoo!  :)


When the pancakes are ready to flip, they will be getting dry on the edges,
and there will be little bubbles forming and popping on their tops.


Flip them over and cook a couple minutes more ~
after that, they're ready to serve and enjoy!  
They never seem to come off the grill quick enough for my clan.  
I think one of those big, flat griddles would be nice.
However, the frying pan does the job just as well.


Soaked Oatmeal Pancakes
~ Originally discovered here and adjusted by moi ~

2 cups Rolled Oats (Old-fashioned variety)

1/2 cup Whole Wheat Flour
1 cup Buttermilk
1 cup Filtered Water
2 Eggs, beaten
1/4 cup Butter (or Coconut Oil), melted
1 tsp Vanilla Extract
2 Tbsp Sugar (Coconut Sugar works well)
1 tsp Baking Powder
1 tsp Baking Soda
1/2 tsp Cinnamon, ground
1/2 tsp Sea Salt

The night before ~ mix together the rolled oats, flour,

buttermilk and filtered water in a glass bowl. 
Cover with plastic wrap and let sit on the counter overnight.

In the morning ~ mix eggs, vanilla, and 

melted butter into oat mixture.  Stir together well.  
In separate bowl ~ stir together the remaining ingredients.
Add the dry ingredients to the wet and mix thoroughly.

Fry on hot (400 degrees) greased griddle or in frying pan.

You will know you pan is hot enough if a few drops of water *dance* on the griddle.
I like to use coconut oil to grease my pan.  Grease between batches.
Cook until bubbles form on the tops of the pancakes.  Flip and cook until golden.

Serve with Maple Syrup and Butter.  Yum Yum!

Makes 16 three inch pancakes.

Enjoy ~ Happy cooking!

With Love, Camille

April 22, 2014

Easy Drop Cheese Biscuits

Cheese biscuits are an easy (and yummy)
side to go with soup or stew.
So quick to whip up.  No counter to clean.
Less than 20 minutes from start to finish.

How can you go wrong?


Originally found in a Company's Coming Cookbook ~
Altered and adjusted by moi. 

2 cups All Purpose Flour
1 Tbsp Sugar (I use organic dehydrated cane juice)
4 tsp Baking Powder
1/4 tsp Sea Salt
2 cups Medium Cheddar Cheese ~ shredded
2 Tbsp Olive Oil
1 cup Whole Milk (or any milk you like)

Measure all dry ingredients and cheese into large bowl.
Mix together well and pour the olive oil and milk in at once.
Stir quickly to incorporate the wet ingredients into the
dry ingredients until just moistened.  Don't over mix!
Drop by heaping soup spoonfuls onto parchment lined cookie sheet.


Bake at 425 degrees F for 12 to 14 minutes.
They will be lightly golden on the edges when they are done.
Makes 11 or 12 large biscuits.

Happy Baking!
Many Blessings, Camille

April 3, 2014

Chocolate Oatmeal

Ready for this?  Yes, I think you are.
Chocolate Oatmeal...see?  I knew you'd be ready.  ;-)
It's simple.  It's quick.  And, it's yummy.  Too good to be true.
What else could you possibly want from your morning bowl of oats?

We like ours topped with chopped pecans and craisins.
Sometimes, the kids will even ask for chocolate chips ~ dear me!
Any way you serve them, they will be a hit ~ I'm sure of it.  :)


Chocolate Oatmeal ~ 
Originally found here...adaptations by moi.

4 cups water
2 cups milk (you can substitute almond milk)
2 1/2 cups rolled oats (I use organic, old fashioned)
1/4 cup unsweetened cocoa powder, sifted
1/2 cup granulated sugar (I use evaporated cane juice)
 1 tsp sea salt (or, any salt you prefer)
2 tsp vanilla extract (I use pure)

Bring water, milk, sea salt, and oats to boil over medium heat.

Stir often so the oats do not stick to the bottom of your pan.
Using a whisk, add in the sugar and the sifted cocoa powder.
Whisk together until smooth, remove from heat, and stir in the vanilla extract.

Cover the oatmeal and let stand for about 15 to 20 minutes to finish cooking.

The longer it sits, the thicker it will get ~ I've left ours as long as 30 minutes.
Stir well prior to serving.  Serves 5 or 6 generously.  Adjust accordingly.

Happy breakfast to you!

Blessings, Camille

February 6, 2014

Hobo Beans with Cornbread

Comfort Food.  Warm and Cosy.
Sounds lovely, don't you think?

We live in Canada.  Although it's not been a snowy winter in our area,

it has been chilly enough to crave some comfort food.
And, the recipes I am sharing here today fit the bill perfectly.

Good enough for company (it's what I plan to serve to friends on a future Friday night),
or for a warm-em-up-and-keep-em-home type of evening with the family.
Either way, I think you'll be satisfied with the effort put into it.
Oh, and the hobo beans simmer all afternoon in the slow cooker.

Ready when you are.  Sounds perfect, doesn't it?
Well, what are you waiting for?  You gonna give 'em a try?

Jennifer Jo and I share similar taste in culinary pursuits it would seem.

When she shares recipes, I sit up and take notice.
I often can be found, after reading her writings about food, 
gathering the necessary ingredients and cooking up a storm.

When she posted about Hobo Beans it was no different.  So, I made them.
Jennifer shares her recipes in the most creative of ways.
It's like reading a story...the story behind the food.  With humour.

And, the food is good.  Very good.


Hobo Beans ~ Altered and Adjusted from Jennifer's Blog.

(The alterations are not because her recipe is lacking ~ not at all.
Rather, the alterations were necessary due to the fact that 
Jennifer has secret ingredients along with stashes from the summer
and other countries that make improvisation a necessity.)

  1/2 lb Bacon ~ crisply fried and crumbled

2 lb Ground Beef
2 medium yellow cooking Onions ~ chopped
6 cloves Garlic ~ minced

1 lb dried Black Beans ~ fully cooked (soak at least 18 hrs prior to cooking)

(This translates into 2 cups dried beans, which become 6 cups cooked.
You can substitute any beans you like ~ red, white, etc.)

  2 tins Crushed Pineapple (12 oz size) ~ Do NOT omit

1 tin Diced Tomatoes (28 oz size)
1 cup Brown Sugar ~ lightly packed
1 tin Tomato Sauce (15 oz size)
1 Tbsp prepared Mustard
2 Tbsp Chili Powder
1 Tbsp Worcestershire Sauce
1 Tbsp Apple Cider Vinegar
Sea Salt added after the cooking time ~ to taste


Fry the bacon and remove from pan.  Drain some of the grease ~ but not all of it.
In the same pan, scramble fry the beef, onions, and garlic until cooked through.
Combine all ingredients together in your slow cooker.
Mix together, cover, and turn the heat to high for an hour or two ~ until bubbling.

Reduce heat to low and let simmer for another 4 to 5 hours.

(If your crock pot is not big enough, or, you don't own such a thing,
a heavy-bottomed stock pot on the stove will work nicely.
Mix all ingredients together in your big pot, bring to a boil, reduce heat to simmer,
cover your pot, and simmer away for a few hours, stirring occasionally.)

These beans do not require any toppings.  They are so yummy by themselves.
However, a good cornbread on the side, and maybe even a salad,
would round out the meal nicely.  Six hungry people will gobble it all up.
But, with these extras to make it go further, you could probably feed eight.


I could not improve on the Cornbread ~  I didn't even try.
It was so yummy my children exclaimed that it was like cake.
I had to agree.  It was amazingly good stuff.  Try it and see for yourself.
Click here to get to Bevy's place where she shares the recipe.
You won't be sorry you did ~ I'm sure of it.


Happy Weekend, Y'all!  

Now, go...cook up your own storm.  ;-)

With Love, Camille

October 30, 2013

Chocolate Pecan Muffins ~ THM Compliant

Have Y'all heard of Trim Healthy Mama?

I kept hearing about it so much, and I was intrigued
enough by all that I read, that I bought the book.
These girls have much to say that makes a lot of sense.
I don't know enough about them to endorse all that they
may stand for, but, the initial results I've had
from eating the way they suggest have been positive.

I've felt better than I have in a long while.
I've dropped 10 pounds without starving myself ~ it really has been painless.
And, the cravings truly are not there or, can easily be satisfied
while staying on plan and continuing to achieve your ideal weight.
It isn't a "diet" in the conventional sense ~
 it's a way of eating and nourishing oneself that is easy to stick to.
It tends to regulate blood sugars and help the body find a good balance.
I have found it to be both satisfying and energizing.  :)

Are you interested to learn more?
Click here to find the book for sale on Amazon.

One thing to mention, and it's a significant thing if you ask me ~
these sisters do not endorse sugar of any kind
if your goal is to lose weight and/or balance your blood sugars.
That means no honey, natural sugar, raw sugar, or maple syrup
for those who are trying to achieve the specific goals mentioned above.
These authors would not include growing children in that restriction.
All of God's good food is encouraged in their case.
And, for everyone, a balanced approach to nutrition is promoted.

They encourage the use of Stevia in a couple of forms.
One of those is Truvia ~ I don't know for sure how I feel about it.  

In the meantime, I have been using it.
That's my disclosure for this post, and I felt it was 
necessary to give it prior to sharing the recipe.  
There.  Now I feel so much better.  *Wink*

Having said all the above, I don't see why you couldn't make these
muffins with regular sugar if you don't want to follow the plan.
I've not actually made them without Truvia, so you'd have to give it a try to see.
According to my calculations, this recipe would require approximately 
3/4 cup to 1 cup of sugar to achieve the same level of sweetness.

Oh, and just so you know.  I still have sugar occasionally.
When I do, however, the scale shows me that I've done it.
It's so empowering to know how to quickly arrest that situation
and stop it in its tracks before it gains a foothold.

Now, on to the recipe!


~ Chocolate Pecan Muffins ~
(Adapted and modified from one of the recipes
which may be found in Trim Healthy Mama)
**These would fall into the S category**

6 Large Eggs ~ Organic, preferrably
2 tsp Vanilla ~ I use the pure extract
1/2 cup + 1 Tbsp Golden Flax Meal
1/2 cup + 1 Tbsp Almond Flour
1/2 cup Unsweetened Cocoa Powder
1/3 cup Truvia sweetener (or 3/4 cup to 1 cup sugar)
1 Tbsp Baking Powder
1 cup Chopped Pecans
1/3 cup Coconut Oil, melted

Whisk together eggs and vanilla in a medium bowl and set aside.
Measure all dry ingredients together in large bowl and
stir until no lumps remain ~ I mix with my fingers.
Mix egg mixture into dry ingredients, stir lightly with a fork.
Add in melted coconut oil and stir together well.
Let sit a minute or two to let batter rise a little.

Spoon into prepared muffin tin.
I use parchment liners in my muffin tin,
but, you could grease the muffin cups prior to filling.
Fill to the tops of the liners ~ I use the large size.
Makes 10 large muffins.

Bake at 375 degrees F for 18 to 20 minutes.
Tester should come out nearly clean. 
Be careful not to over bake as your end product will be too dry.
Serve warm with butter.  Enjoy!

Many Blessings,
Camille

**Disclaimer ~ I only endorse things that I use and enjoy.
I am not compensated in any way for my opinions.
They are just that ~ opinions.  Please do your own research
in order to be sure that you have made the right choice for you.  :)